A comparative market analysis, or CMA, is an examination of the prices at which similar properties in the same area recently sold. Since no two properties are identical, you'll make adjustments for the differences between the target property and the comparable properties (henceforth, known as comps) to determine a fair price.
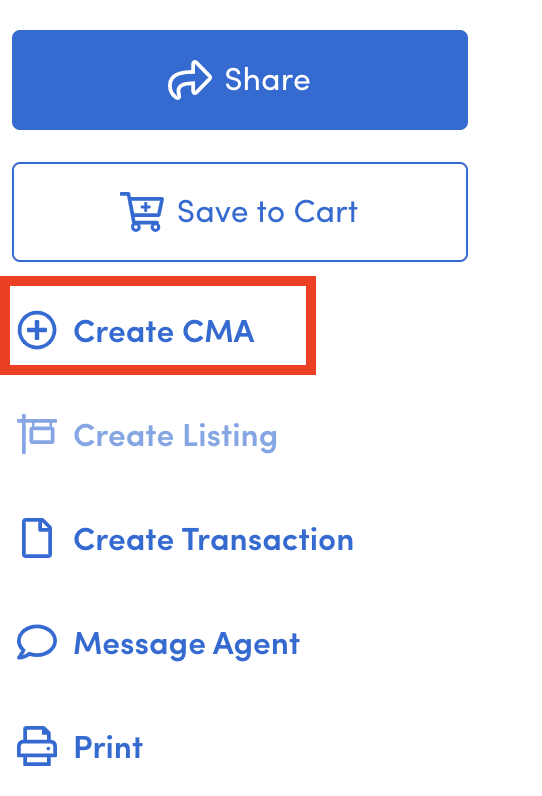
CMA 360 allows you to print your own custom reports directly from Remine. CMA is available with all subscription plans, and there's no limit to the number of reports you can create. Remine CMA appears when you click the Create CMA button on the Property Details page.
Begin to Create a CMA 360
- Access the property details page for the property you wish to create a CMA.
- Click Create CMA from the menu options. From the drop down, select Remine CMA 360.
3. Continue to Steps to Personalize Your CMA 360.
Steps to Personalize Your CMA 360
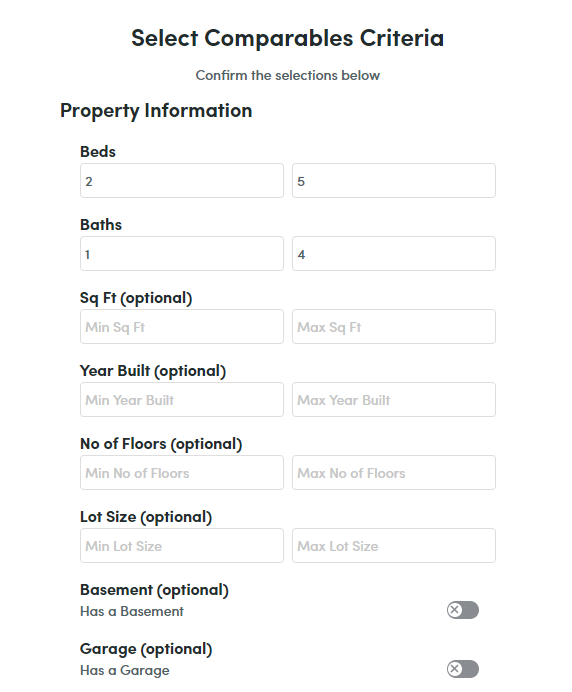
1. Select Criteria
- The Select Comparables Criteria page appears, and the selected property is automatically added to your Carts. Fill out the form based on the comps that you want to find.
- Click the Search button at the bottom of the page.
2. View Results
- The View Results page appears.
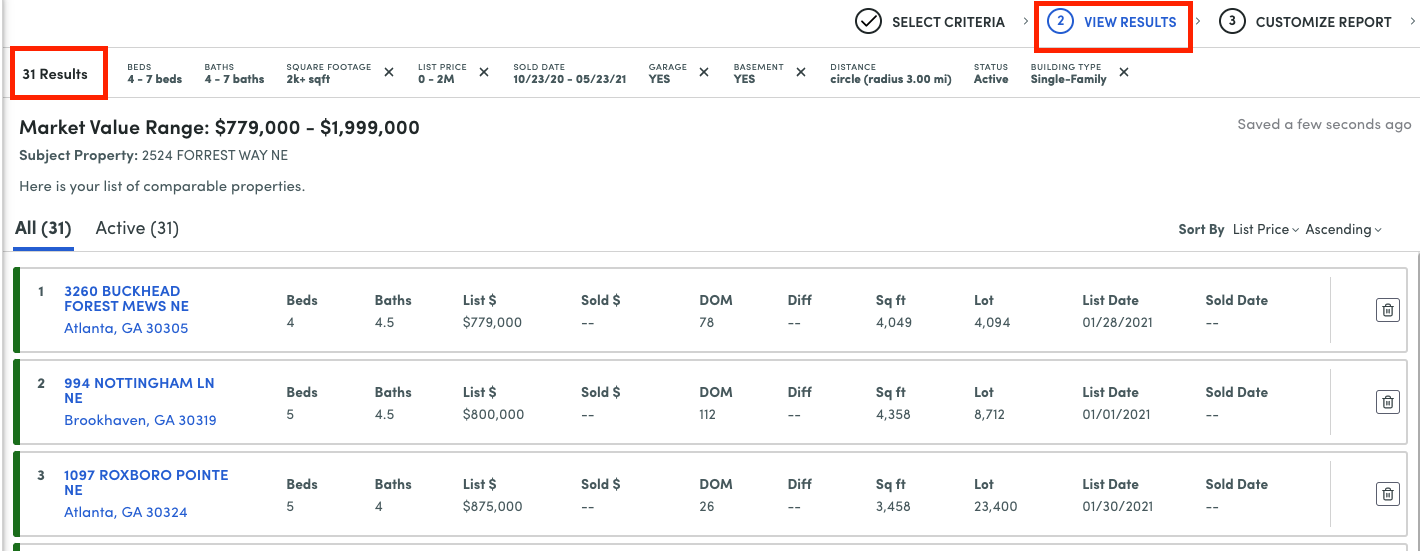
- Review the list of comps. You can adjust them as needed.
- Hover over a list item and the corresponding pin on the map wobbles to identify itself.
- To view the Property Details page for that property, click an address in the list.
- To remove a comp from your CMA, in the row for the property, click the
 button.
 - To add a removed comp back to your CMA, in the row for the property, click the
 button.
- Click the Save & Continue button in the upper right corner to move to the next step.
3. Customize Report
- The Customize Report page appears.
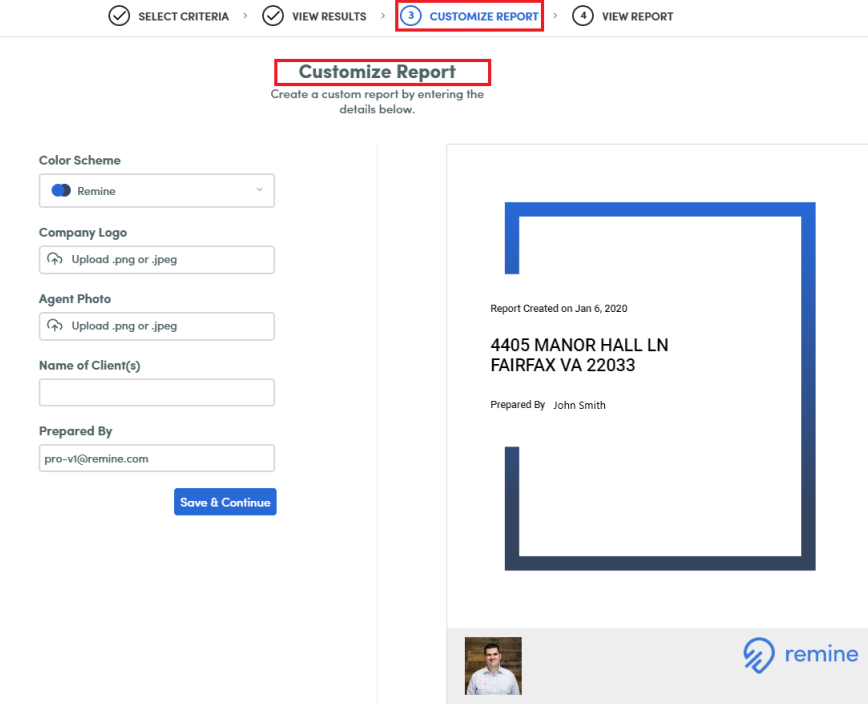
- Customize the look and feel of your PDF report by selecting a color scheme, uploading a photo and logo, typing the name of the clients, and adding which agent(s) prepared the report.
- Click the Save & Continue button at the bottom of the page to move to the next step.
4. View Report
- The View Report page appears with your final report.
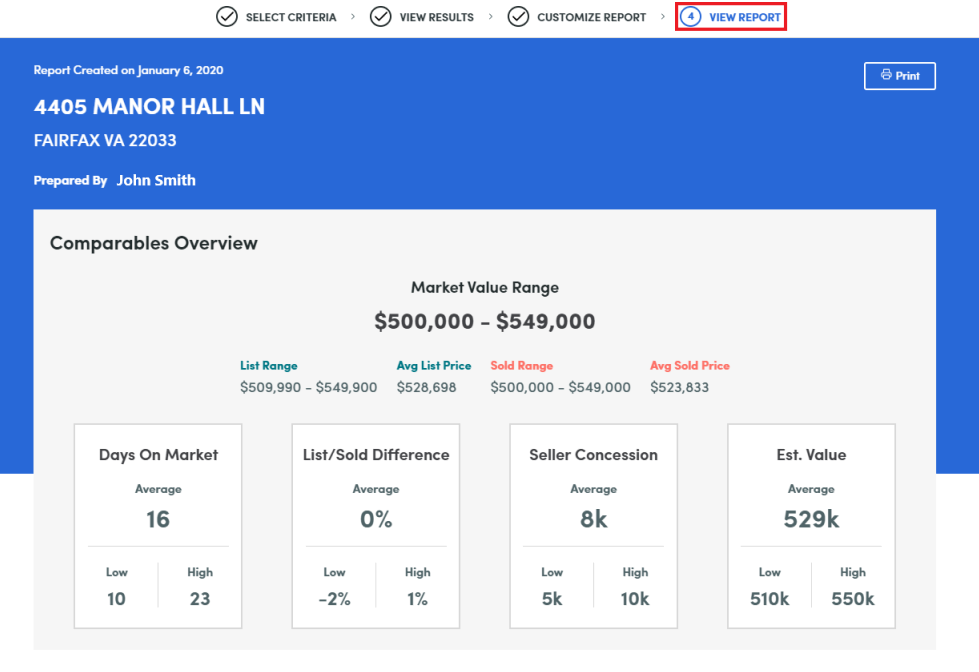
- Print the PDF of your CMA by clicking the Print button in the upper right corner of the screen.
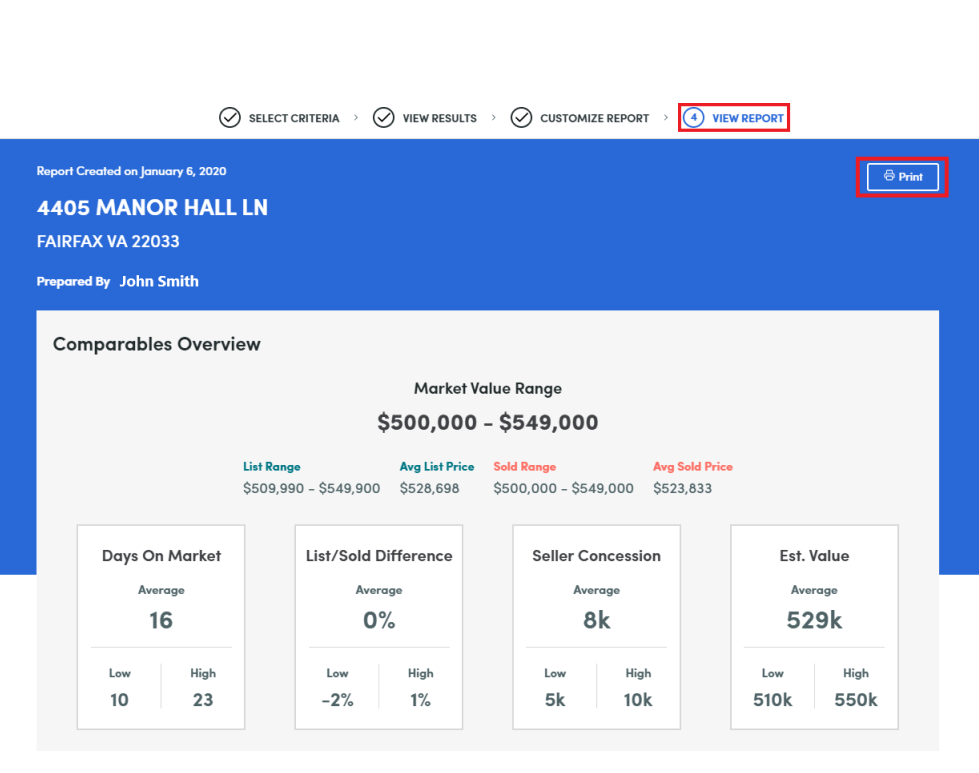
- The Print CMA window appears.
-
- Name your file and select whether you wish to include photos and valuations. Make your selections and click Print. The report downloads automatically.
- Click the Close button in the upper right corner to exit the report screen.
How to Create a CMA in Remine Video:
Comments
Article is closed for comments.